
Zephyr is an open-source real-time operating system for microcontrollers and other resource-constrained devices, governed by the Linux Foundation. It gives you a scheduler, device drivers, networking and Bluetooth stacks, a build system and a hardware abstraction layer that runs the same application on hundreds of boards from different vendors. This post explains what Zephyr is, why it has become the default choice for new embedded projects and how to build and flash your first application.
What is Zephyr?
Zephyr started life as Rocket, a small kernel from Wind River Systems, and became a Linux Foundation project under its current name in 2016. Since then it has grown into one of the most actively developed open-source projects in the embedded world, with contributions from Google, Meta, Intel, Nordic Semiconductor, NXP and many others. The commit history shows a project maintained by many companies rather than owned by one.
Its design borrows heavily from Linux: a Kconfig-based configuration system, devicetree for describing hardware, a modular kernel and a west tool that manages the workspace. If you have built a Linux kernel, Zephyr will feel familiar. If you have only used vendor SDKs, the biggest change is that the application, the board and the RTOS are cleanly separated.
Main features of Zephyr
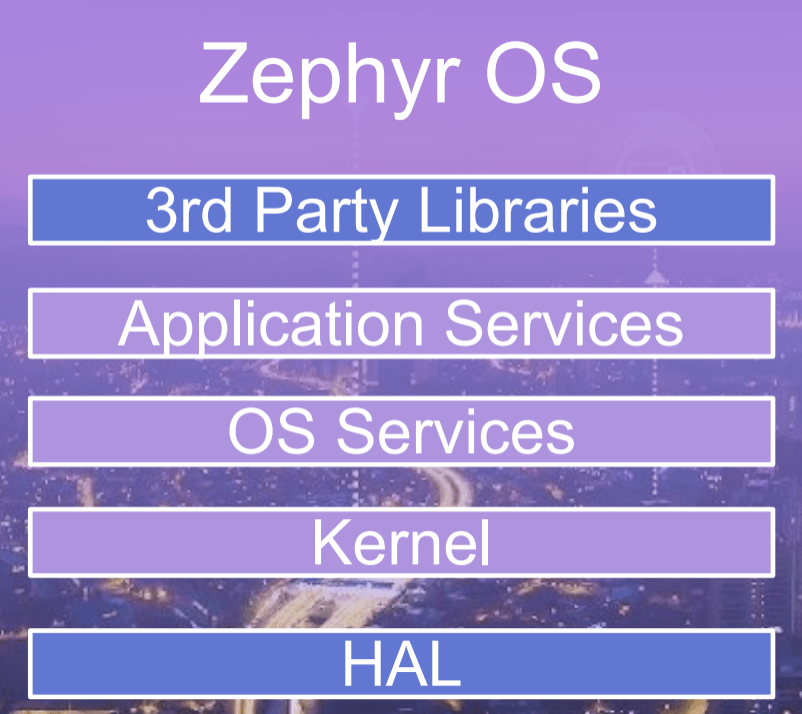
- Open source
- A small, stable kernel with a low memory footprint, suitable for devices from a few kilobytes of RAM up to application-class microcontrollers.
- Support for many CPU architectures, including Arm Cortex-M and Cortex-A, RISC-V, x86, Xtensa and ARC, and more than 600 boards.
- Regular releases and long-term support branches.
- Thorough documentation and an active community.
- A modular architecture: pull in only the subsystems you configure.
- An included test framework (Twister) and continuous integration across boards.
- Designed with safety and security in mind, with an ongoing functional-safety certification effort.
- Vendor neutral, so you are not tied to one chip maker’s SDK.
- A large module ecosystem for third-party libraries.
Architecture
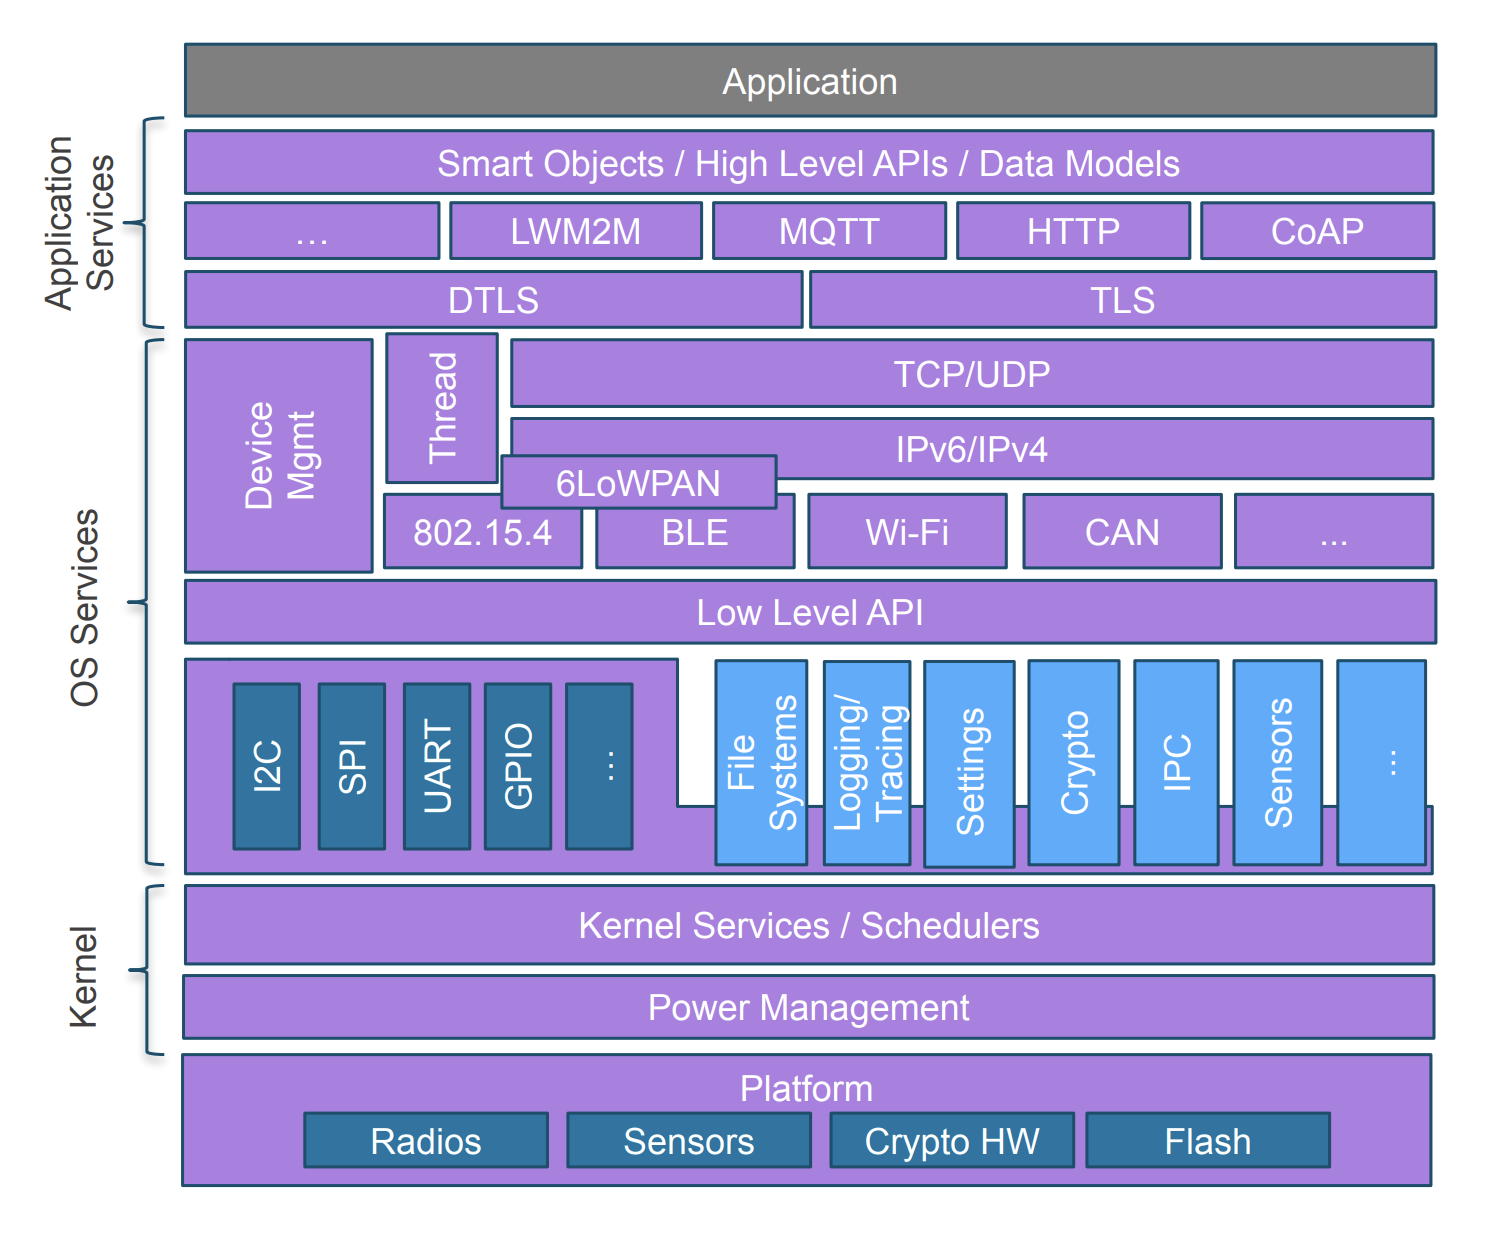
An application sits on top of OS services such as networking, file systems and Bluetooth, which sit on the kernel, which talks to hardware through device drivers generated from the board’s devicetree. Changing boards means changing the devicetree and Kconfig, not the application code.
Getting started
Before building, complete the official getting started guide, which installs the toolchain, the west tool and the Zephyr source tree.
A minimal application has three files. First, src/main.c for a blinking LED:
#include <zephyr/kernel.h>
#include <zephyr/drivers/gpio.h>

/* 1000 msec = 1 sec */
#define SLEEP_TIME_MS   1000

/* The devicetree node identifier for the "led0" alias. */
#define LED0_NODE DT_ALIAS(led0)

/*
 * A build error on this line means your board is unsupported.
 * See the sample documentation for information on how to fix this.
 */
static const struct gpio_dt_spec led = GPIO_DT_SPEC_GET(LED0_NODE, gpios);

void main(void)
{
	int ret;

	if (!gpio_is_ready_dt(&led)) {
		return;
	}

	ret = gpio_pin_configure_dt(&led, GPIO_OUTPUT_ACTIVE);
	if (ret < 0) {
		return;
	}

	while (1) {
		ret = gpio_pin_toggle_dt(&led);
		if (ret < 0) {
			return;
		}
		k_msleep(SLEEP_TIME_MS);
	}
}
Zephyr uses CMake. Add this CMakeLists.txt to the application root:
cmake_minimum_required(VERSION 3.20.0)
find_package(Zephyr REQUIRED HINTS $ENV{ZEPHYR_BASE})
project(blinky)

target_sources(app PRIVATE src/main.c)
Application configuration lives in a Kconfig fragment called prj.conf. The blinky program needs the GPIO driver, so enable it there:
CONFIG_GPIO=y
Build for your board, replacing the board name with one from west boards:
cd app
west build -p always -b <your-board-name> app
Flash the firmware:
west flash
Conclusion
Zephyr has become the default starting point for new embedded products because it removes the two costs that used to dominate firmware projects: writing a scheduler and drivers yourself, or being locked into one vendor’s SDK. Google uses it for Chromebook embedded controllers, Nordic has built its nRF Connect SDK on it and most new Bluetooth Low Energy designs I see start from a Zephyr sample.
If you write C for microcontrollers, build the blinky above on a development board you already own; most popular boards are supported out of the box. The official documentation is good, and the C refresher on this site covers the pointer and byte-handling idioms you will use in every Zephyr driver callback. For connecting a device to a server once it boots, see Iotcore, an MQTT broker you can embed in a Python backend.


